How to Use a Coir Mulch Mat: A Quick Planting Guide
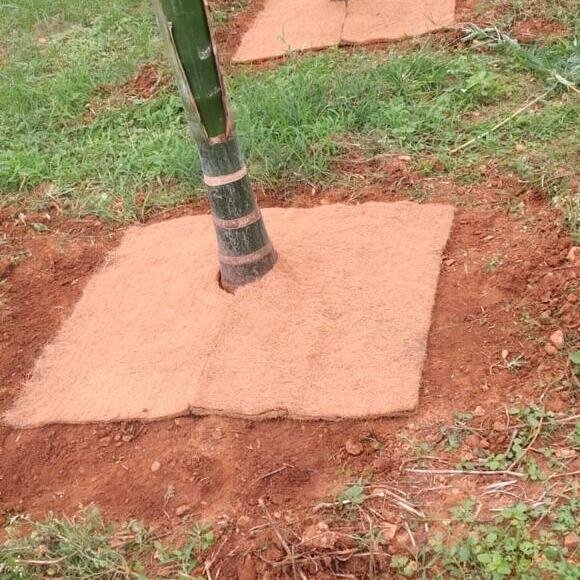
If you’ve never used a coir mulch mat before, the idea is simple: lay a disc or square of dense coconut-fibre matting around the base of a plant, and it does three jobs at once — blocks light from reaching weed seeds, slows moisture evaporating from the soil, and buffers the root zone against sudden temperature swings.
Here’s the short version of how to lay one:
1. Water the soil well before laying the mat — it’s much easier to fit snugly against damp soil than dry, compacted ground.
2. Most mats come with a slit cut to the centre, or a hole. Slide the slit around the stem or trunk so the mat sits flat on the soil, stem passing through the centre.
3. For young trees or saplings, leave a couple of centimetres of clear space right around the stem itself — mulch piled directly against bark can trap moisture and encourage rot.
4. Overlap the slit edges slightly once it’s in position, so weeds can’t push up through the gap.
5. Top with a light layer of soil or compost at the edges if it’s windy, just to help it stay put until it settles in.
One thing that surprises first-time users: unlike plastic weed membrane, a coir mat doesn’t need to be removed at the end of the season. It breaks down naturally over 12–24 months depending on climate and soil biology, adding organic matter back into the soil as it goes — which is really the whole point of using coir over a synthetic alternative in the first place.
If you’re mulching a whole bed rather than individual plants, a coir mulch roll (cut to size) covers more ground faster than individual mats — worth asking us about if you’re working at that scale.